


This article explains how to add multiple languages, add translations and change the default language for a questionnaire.
It is recommended that the language(s) be defined at the very beginning of the questionnaire creation or editing process.
How to set and define the respondent’s default language and available languages is described here.
Initial set up
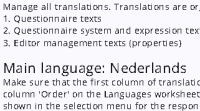
A new questionnaire is created with one language—usually Dutch (Nederlands). All buttons and labels appear in that language, and the question text shown to respondents matches what is displayed in the Survey Editor. In newly created projects, the initial questions are in English.
The default language can be changed using Excel by exporting translations from the Translations tab in the Survey Editor. The steps below show how to set English (UK) as the default language, but the same procedure applies to any language by using the appropriate code.
Although this can be done later, it is easiest at the beginning, when fewer settings are in place. Translations for new questions can be added after all questions have been created.
Step by step
Step 1: Define the default language for respondents
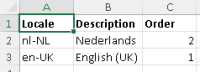
Add en-UK, English (UK), 1 to the Excel sheet to set English as the default language for respondents. If nothing is specified for the respondent’s language then all texts will then be displayed in English.
The order of the rows does not matter; the Order column determines the language sequence (lowest value first) for the respondent.
Step 2: Add en-UK columns
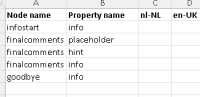
The Excel file contains several tabs with texts for questions, buttons, and other elements. Each tab includes an nl-NL column for the Dutch texts. To add English, insert an en-UK column— in this example, at the end of the file
It is important that the order of the columns matches the order in which the languages are listed in the first tab; otherwise, an error will occur during upload.
Step 3: Add translations
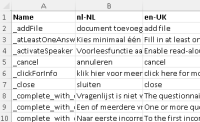
The content of the first language column (in this case, nl-NL) is always ignored when uploading the Excel file. This content is managed in the Survey editor, either in the Translations tab (for Dictionary items) or via the node tree.
Step 4: Uploading the translations
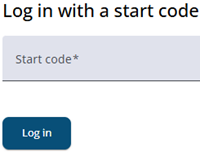
Once the languages have been defined, the file can be uploaded and the result tested. After saving the questionnaire, click the Open Questionnaire icon in the top-right corner. This opens a window where a start code can be entered. The language used will be the one with the lowest order value.
Note: If this step is repeated with different default languages, clear the cookies in this window or use an incognito window. The browser remembers the last selected language and will reuse it.
Step 5: Changing the system language (advanced)
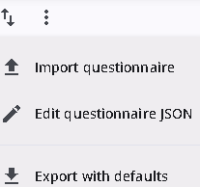
The texts shown in the List of translations on the Translations tab are not affected by changes to the default language in the Excel file. By default, these texts are displayed in Dutch.
They can be changed to English (UK) by opening the script editor, setting systemLanguage to en-UK, and saving the questionnaire. After closing the script editor, the items in the list will be displayed in English.
Note: The system provides default translation texts for English and Dutch, which are used by default but can be overwritten. For other languages, no default texts are available.
The language order on the first tab of the translation Excel file will change to en-UK, and this order will be reflected on the other tabs as well.
Changing the system language also affects nodes. On each node, the Translations tab will display a list of languages other than the system language, where translations can be managed.
Care should be taken when changing the system language, as it may affect saved texts.