


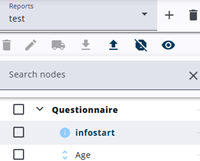
In some cases, it may be useful to import and export nodes. To do this, select the nodes to be exported (child nodes are included automatically but can be deselected) and click the arrow-down icon to create a download file.
This file can then be uploaded using the arrow-up icon, either into the same report or into a different one.
A window with import options will appear, allowing changes to the node names, such as adding a prefix or suffix or replacing part of the name. The preview on the left side of the window shows the final result.
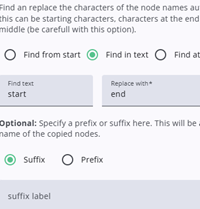
The first section in the right pane provides the option to replace strings in the node name with a new string.
The replacement can be applied at the start, within the text, or at the end of the name. The left pane shows the final result of the replacement.
The second section provides the option to add either a prefix or a suffix to the names of the new nodes. The result is also reflected in the left pane.
The new nodes are added to the node tree after Confirm is pressed and are placed directly after the last selected node. If one of the new names already exists in the node tree, the new node will receive _1 as a suffix (or _2, if needed).