


Themes define the overall appearance of the questionnaire software, including the colours and fonts displayed to respondents.
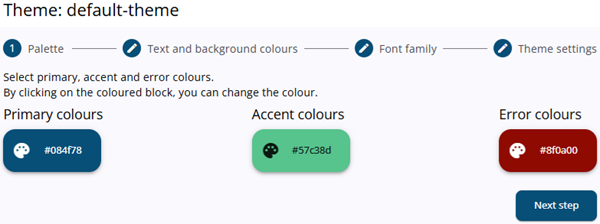
The theme editor can be accessed via the Projects portal under Templates/themes in the Themes tab, as well as through the Theme icon in the top-right corner of the Survey Editor. If multiple themes are available, the theme to be adjusted should be selected, after which the steps in the wizard can be followed.
Changes to existing themes can be made from both locations. However, new themes can only be created via the Projects portal. When changes are made through the Survey Editor, a copy of the theme is created that is only available within the selected project. Changes made through the Projects Portal are applied across all projects.
It is also possible to set a theme as the default. This default theme is used for projects that do not yet have a theme assigned. Only an Administrator can set a theme as the default.
The wizard
The wizard contains of several steps, and these guid the user through the different parts of the theme.
Step 1: Define the main colours
It starts with the current colour palette: the primary colour, the accent colours and the error colours. These colours can be changed by clicking on the boxes.
| Primary colour | The main colour of the application, used for key elements and overall branding. |
| Accent colour | A secondary colour used to highlight important or interactive elements. |
| Error colour | The colour of the error messages. |
Step 2: Define the main colours
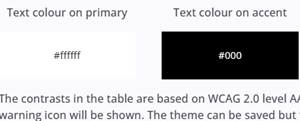
In the second step, the font colours for the primary and accent colours can be set, along with the main background colour. Changes are reflected immediately after a colour is selected, and the system checks whether the chosen combinations ensure sufficient readability.
Step 3: Define the fonts
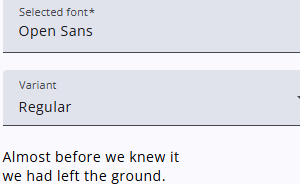
In the third step, the font and font size can be selected.
A preview at the bottom shows how the text will appear with the chosen settings.
The line height does not affect the size of the letters; instead, it controls the spacing between lines.
Step 4: The final step
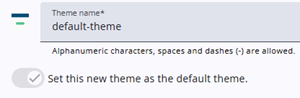
In the final step, the theme name can be set and it can also be designated as the default theme.