


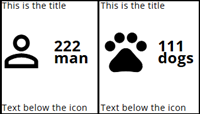
Rows can be created to group one or more widgets (up to four) within a single row. Each row can be arranged using predefined layouts of two, three, or four equal columns.
Widgets can then be dragged from the list of widgets underneath the row and will be displayed horizontally.
Arranging widgets in a row
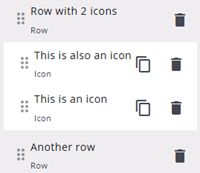
Widgets placed inside a row appear with a small indent in the widget list, indicating that they belong to that row. Additional widgets can be dragged into the row; if the maximum number of widgets is already reached, the last widget in the row will be removed.
The number of widgets that can be placed in a row depends on the selected column layout, see also the section below.
Note: In some cases, it may be necessary to save the response view before changes to the Columns value take effect.
Settings
A row has only three settings, which are described in the table below.
| Setting | Description |
| Columns | Choose the number of columns in the row (1–4) and select the column layout from the dropdown. The layout determines how the available space is divided between the columns (for example, equal columns or wider and narrower columns). |
| Header | The header of the row. |
| Background colour | The background colour of the row. |